PHPDocX v3.7 Tutorial
In this tutorial we are going to show you:- How to install PHPDocX
- How to build a Word document from scratch using PHPDocX
- How to prepare a template for PHPDocX
- How to process a template with PHPDocX
- Appendix: how to insert complex paragraphs into a Word document
- Appendix: how to use the PDF/DOC/RTF/HTML/ODT conversion plugin
- Appendix: debugging options
Since v3.0 PHPDocX is not fully backwards compatible with the older v2.7 version. if you prefer to stick to the older version you may still access the v2.7 tutorial.
PHPDocX installation
PHPDocX is very easy to install. Usually it is just enough to unzip the package somewhere in your server and it is (almost) ready to go.
Obviously, as you could have guessed by its name, PHPDocX requires PHP 5 to be installed in your server. Moreover the following PHP modules should be activated:
- ZipArchive
- XSLT
- Tidy (not strictly necessary but highly recommended)
For your convenience we have included a PHP script in the package (directly located in the app root folder), check.php, that will check if any of the requirements are missing.
Of course, DO NOT FORGET to include the license key for the PRO version:
- Download the license key from the "MyPHPDocX section" of this website.
- Copy it (plain, with no other word or character) in code option in the config/phpdocxconfig.ini file.
- If you have got the Corporate version of the library you also need to include the domain name in the domain file that you may find also in the classes folder.
WARNINGS:
- The folder where your scripts are running and/or the folder where you want to store the resulting Word documents have to have writing permissions rights.
- If posible use always UTF-8 compatible editors to code your scripts or modify any script in the PHPDocX library. The final Word documents have to be UTF-8 encoded and nonUTF-8 characters may break the final document.
- All the content in a .docx file is stored in XML files so you should escape certain protected characters like the ampersand symbol (write & instead of &).
- Make sure that your web server has activated the .docx MIME type in case you want your users to download directly the resulting Word documents to the browser (if not IE will believe that is a zip file).
There is no a priori restrictions about the OS and server software as long as it may run PHP 5. That includes, of course, basically all LINUX and UNIX distributions as well as Windows and Mac OS. You may use Apache as web server or lighttp, nginX, IIS, etcetera.
PHPDocX may use external data for your reports and documents coming from virtually any data source and it is the responsability of the user to prepare it so PHPDocX can represent it adequately. PHPDocX DOES NOT require MySQL or any other specific Database software for its deployment and correct functioning.
You DO NOT need any copy of Microsoft Office Word to generate your Word documents.
PHPDocX PRO does also not need any kind of outbound connection to work so it does not depend directly of a working Internet connection or any kind of additional third party software.
Creating a Word document from scratch
Let´s start with the standard "hello world" document.
The required script reads as follows:
require_once(path_to_phpdocx/classes/CreateDocx.inc);
$docx = new CreateDocx();
$docx->addText('Hello world!');
$docx->createDocx('../word_documents/hello_world');
The first line: require_once(path_to_phpdocx/classes/CreateDocx.inc) is a call to the main class in PHPdocX, and path_to_phpdocx has to be sustituted by the actual path to the library relative to the current script.
You can see here the final result and download the corresponding Word document :

OK, this has been simple enough but not very rewarding. Let's go one step further and introduce a little more of formatting:
require_once(path_to_phpdocx/classes/CreateDocx.inc);

$docx = new CreateDocx();
$text = array();
$text[] =
	array(
	'text' => 'I am going to write',
	);
$text[] =
	array(
	'text' => ' Hello World!',
	'b' => 'single',
	);

$text[] =
	array(
	'text' => ' using bold characters.',
	);
$docx->addText($text);
$docx->createDocx('../word_documents/hello_world_2');
Well now this start to look a little nicer although we have still some work ahead (download the corresponding Word document):

At this point one may wonder if there is a simple way to "wrap" our document in a more beautiful frame including, for example, headers and footers and even a first page.
There are three ways to do so:
- Importing the headers and footers from an existing Word document.
- Creating your own headers and footers via the addheader and addFooter methods.
- Using a different base template with all the required formatting.
Like we have not yet talked about the "base template", which turns to be an important and useful concept in the 2.5 version of the library and the addHeader and addFooter methods required of certain concepts not yet introduced, we will restrict ourselves,by the time being (please, be patient), to the first of the available solutions.
We have already prepared a standard Word document (.docx, of course) with a nice header and footer that we would like to insert in our current document. Its relative path to this script is, for example, resources/niceHeaderAndFooter.docx.
So let's proceed:
require_once(path_to_phpdocx/classes/CreateDocx.inc);

$docx = new CreateDocx();

//Importing header and footer from external .docx file
$docx ->importHeadersAndFooters('../word_documents/templateHeaderAndFooter.docx');
$text = array();
$text[] =
	array(
	'text' => 'I am going to write',
	);
$text[] =
	array(
	'text' => ' Hello World!',
	'b' => 'single',
	);

$text[] =
	array(
	'text' => ' using bold characters.',
	);
$docx->addText($text);

$docx->createDocx('../word_documents/hello_world_headersAndFooters');
This is definitely starting to look much nicer (download the corresponding Word document):

If you prefer only to import the header you may have used:
$docx ->importHeadersAndFooters('../word_documents/templateHeaderAndFooter.docx', 'header') and equivalently $docx ->importHeadersAndFooters('../word_documents/templateHeaderAndFooter.docx', 'footer') if you only wish to import the footer.
The footers and headers can include photos, tables, standard text, lists, links, shapes, etcetera. The import procedure also preserves the display properties of the headers and footers (first, even and odd pages).
Now to continue we are going to populate our word document with a series of standard objects:
- Lists
- Tables
- Images
- Charts
There are many other posibilities but we prefer to refer to the documentation for a complete set of examples in order not to clutter this tutorial with unneeded details.
Let us first include a simple unordered nested list after our "hello world" paragraph. In order to do so we should use the addList method:
//Call to PHPDocX
require_once(path_to_phpdocx/classes/CreateDocx.inc);
$docx = new CreateDocx();
//Importing header and footer from external .docx file
$docx ->importHeadersAndFooters('../word_documents/templateHeaderAndFooter.docx');
$text = array();
$text[] =
array(
'text' => 'I am going to write',
);
$text[] =
array(
'text' => ' Hello World!',
'b' => 'single',
);
$text[] =
array(
'text' => ' using bold characters.',
);
//We insert the the text into the Word document
$docx->addText($text);
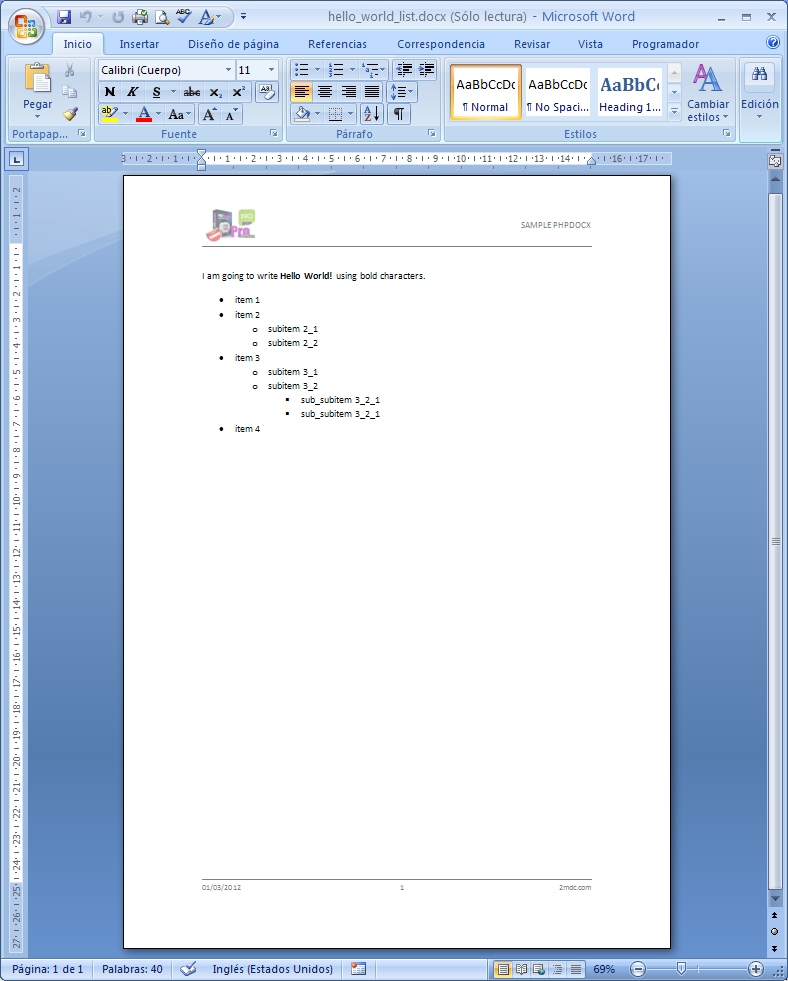
//Let us now to add a nested unordered list
$myList = array('item 1',
'item 2',
array('subitem 2_1',
'subitem 2_2'),
'item 3',
array('subitem 3_1',
'subitem 3_2',
array('sub_subitem 3_2_1',
'sub_subitem 3_2_1')),
'item 4');
$docx->addList($myList, array('val' => 1));
$docx->createDocx('../word_documents/hello_world_list');
What we get looks like this (download the corresponding Word document):
If you had choosen array('val' => 2) you would have got a standard numbered list. Now you may wonder:
- How can I get customized list styles?
- How can I insert something more than plain text as an item for a list?
The answer to the first question is pretty simple: you may run the parseStyles() method (see example) in a separate script and generate a Word document with all the info about the list, paragraph and table styles that are available by default. We will see later that if you choose to use your own "base template" you may incorporate all the styles you wish.
The answer to the second question is a little more elaborate but still simple enough: you should use the rawWordML option and the createWordMLFragment to achieve more sophisticated formatting:
The corresponding code reads:
//Call to PHPDocX
require_once(path_to_phpdocx/classes/CreateDocx.inc);
$docx = new CreateDocx();
//Importing header and footer from external .docx file
$docx ->importHeadersAndFooters('../word_documents/templateHeaderAndFooter.docx');
$text = array();
$text[] =
array(
'text' => 'I am going to write',
);
$text[] =
array(
'text' => ' Hello World!',
'b' => 'single',
);
$text[] =
array(
'text' => ' using bold characters.',
);
//We insert the the text into the Word document
$docx->addText($text);
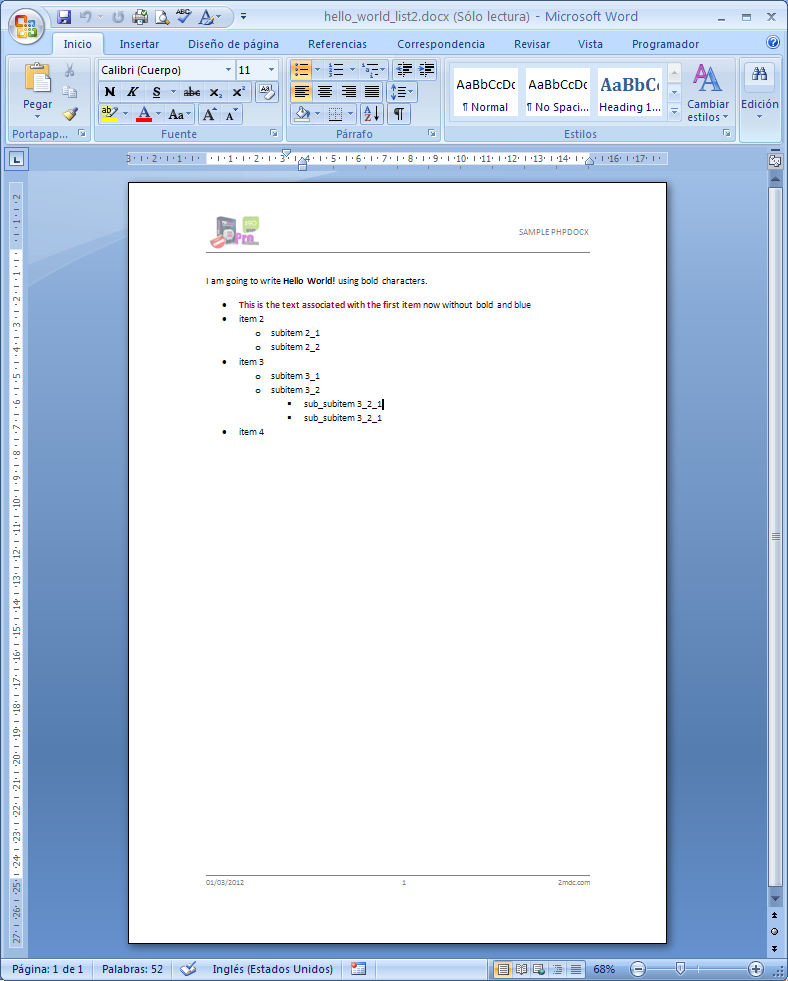
//We first prepare an item list element with more sophisticated formatting:
$newText = array(
array(
'text' => 'This is the text associated with the first item',
'b' => 'single',
'color' => 'b70000',
),
array(
'text' => ' now without bold'
),
array(
'text' => ' and blue',
'color' => '0000b7'
)
);
$formattedText = $docx->addText($newText, array('rawWordML' => true));
$myItem = $docx->createWordMLFragment(array($formattedText)));
//Let us now to add a nested unordered list
$myList = array($myItem,
'item 2',
array('subitem 2_1',
'subitem 2_2'),
'item 3',
array('subitem 3_1',
'subitem 3_2',
array('sub_subitem 3_2_1',
'sub_subitem 3_2_1')),
'item 4');
$docx->addList($myList, array('val' => 1));
$docx->createDocx('../word_documents/hello_world_list2');
And you get (download the corresponding Word document):
This way to insert elements one within the other may be extended to other cases in a simple way:
- Set the rawWordML option to true.
- Create a WordML fragment via the createWordMlFragment method incorporating all the required content via an array.
- Insert the resulting WordML fragment:
- within a table,
- within a list (only inline content),
- anywhere in the Word document with the addRawWordML method,
- or in the headers and footers via the addHeader and addFooter methods.
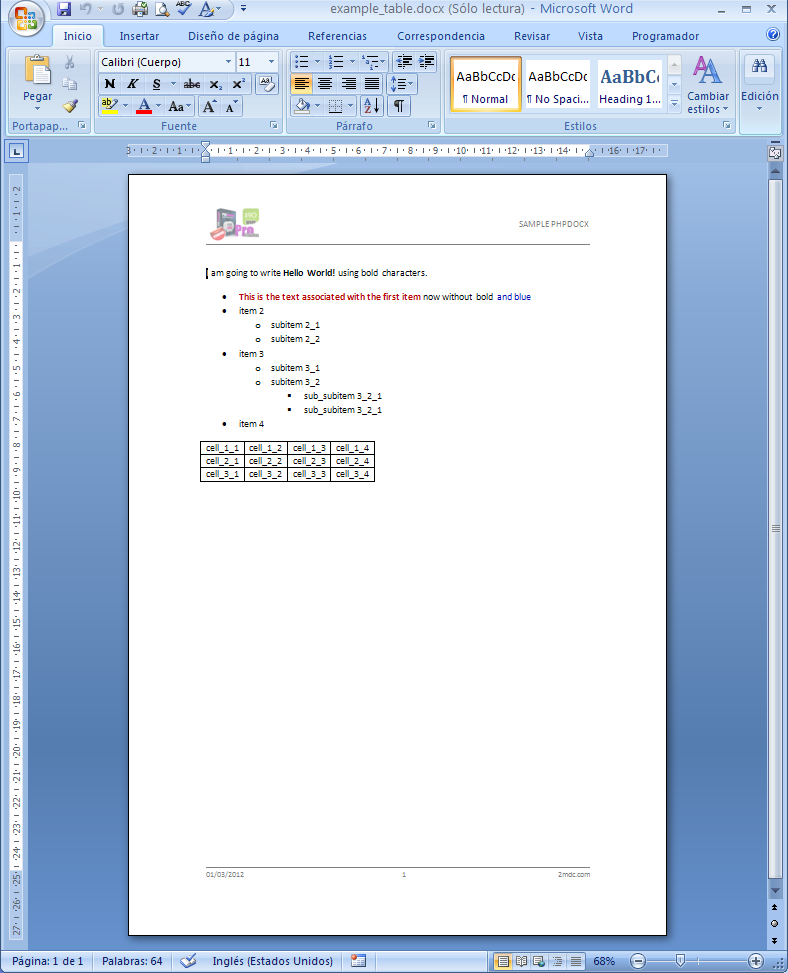
Now we will try to insert a simple table so our Word document gets richer in contents.
//Call to PHPDocX
require_once(path_to_phpdocx/classes/CreateDocx.inc);

$docx = new CreateDocx();

//Importing header and footer from external .docx file
$docx ->importHeadersAndFooters('../word_documents/templateHeaderAndFooter.docx');

$text = array();
$text[] =
	array(
	'text' => 'I am going to write',
	);
$text[] =
	array(
	'text' => ' Hello World!',
	'b' => 'single',
	);
$text[] =
	array(
	'text' => ' using bold characters.',
	);
//We insert the the text into the Word document
$docx->addText($text);

//We first prepare an item list element with more sophisticated formatting:
$newText = array(
	array(
		'text' => 'This is the text associated with the first item',
		'b' => 'single',
		'color' => 'b70000',
	),
	array(
		'text' => ' now without bold'
	),
	array(
		'text' => ' and blue',
		'color' => '0000b7'
	)
);

$formattedText = $docx->addText($newText, array('rawWordML' => true));

$myItem = $docx->createWordMLFragment(array($formattedText)));

//Let us now to add a nested unordered list
$myList = array($myItem,
                'item 2',
                array('subitem 2_1',
                      'subitem 2_2'),
                'item 3',
                array('subitem 3_1',
                      'subitem 3_2',
                      array('sub_subitem 3_2_1',
                            'sub_subitem 3_2_1')),
                'item 4');

$docx->addList($myList, array('val' => 1));

$valuesTable = array(
	array(
	'cell_1_1',
	'cell_1_2',
	'cell_1_3',
	'cell_1_4'
	),
	array(
	'cell_2_1',
	'cell_2_2',
	'cell_2_3',
	'cell_2_4'
	),
	array(
	'cell_3_1',
	'cell_3_2',
	'cell_3_3',
	'cell_3_4'
	)
);

$paramsTable = array(
	'border' => 'single',
	'border_sz' => 10
	);

$docx->addTable($valuesTable, $paramsTable);

$docx->createDocx('../word_documents/example_table');
And you get (download the corresponding Word document):
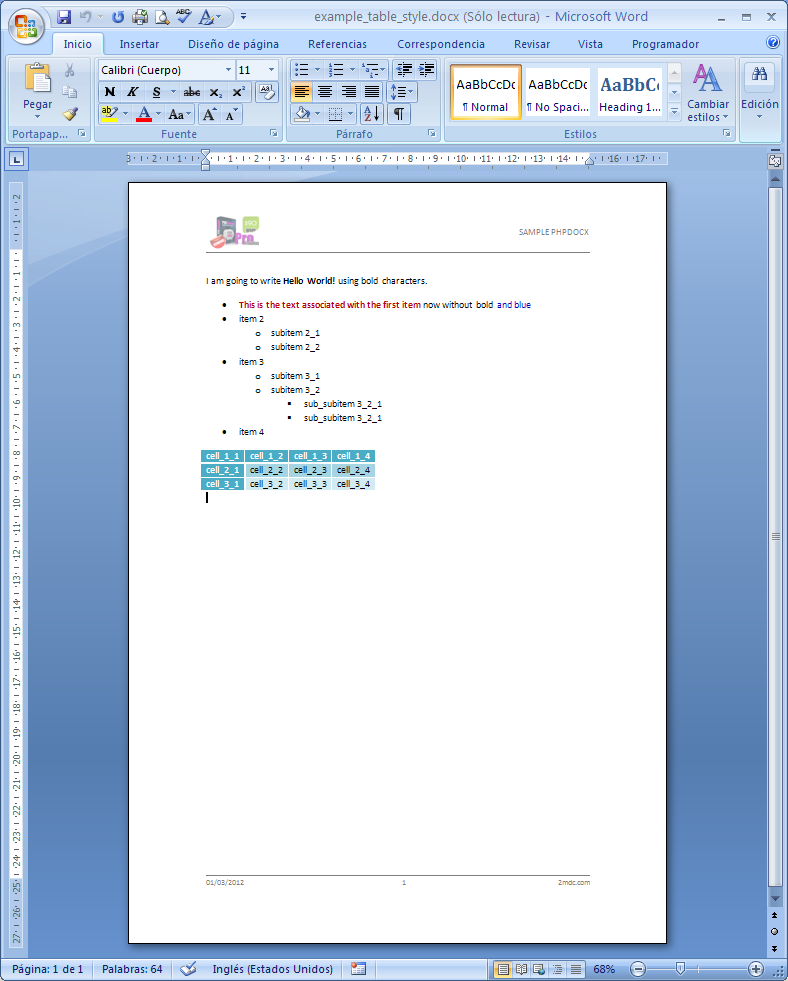
This is certainly not the most beautiful table you have ever seen but we can solve that problem pretty easily by having a look at the available table styles in the document that we have generated before with the parseStyles() method.
For example we may use the "MediumGrid3-accent5PHPDOCX" accent table style (blame Word for the funky names):
//Call to PHPDocX
require_once(path_to_phpdocx/classes/CreateDocx.inc);

$docx = new CreateDocx();

//Importing header and footer from external .docx file
$docx ->importHeadersAndFooters('../word_documents/templateHeaderAndFooter.docx');
$text = array();
$text[] =
	array(
	'text' => 'I am going to write',
	);
$text[] =
	array(
	'text' => ' Hello World!',
	'b' => 'single',
	);

$text[] =
	array(
	'text' => ' using bold characters.',
	);
$docx->addText($text);

//We first prepare an item list element with more sophisticated formatting:
$newText = array(
	array(
		'text' => 'This is the text associated with the first item',
		'b' => 'single',
		'color' => 'b70000',
	),
	array(
		'text' => ' now without bold'
	),
	array(
		'text' => ' and blue',
		'color' => '0000b7'
	)
);

$formattedText = $docx->addText($newText, array('rawWordML' => true));

$myItem = $docx->createWordMLFragment(array($formattedText)));

//Let us now to add a nested unordered list
$myList = array($myItem,
                'item 2',
                array('subitem 2_1',
                      'subitem 2_2'),
                'item 3',
                array('subitem 3_1',
                      'subitem 3_2',
                      array('sub_subitem 3_2_1',
                            'sub_subitem 3_2_1')),
                'item 4');

$docx->addList($myList, array('val' => 1));

$valuesTable = array(
	array(
	'cell_1_1',
	'cell_1_2',
	'cell_1_3',
	'cell_1_4'
	),
	array(
	'cell_2_1',
	'cell_2_2',
	'cell_2_3',
	'cell_2_4'
	),
	array(
	'cell_3_1',
	'cell_3_2',
	'cell_3_3',
	'cell_3_4'
	)
);

$paramsTable = array('TBLSTYLEval' => 'MediumGrid3-accent5PHPDOCX');

$docx->addTable($valuesTable, $paramsTable);

$docx->createDocx('../word_documents/example_table_style');
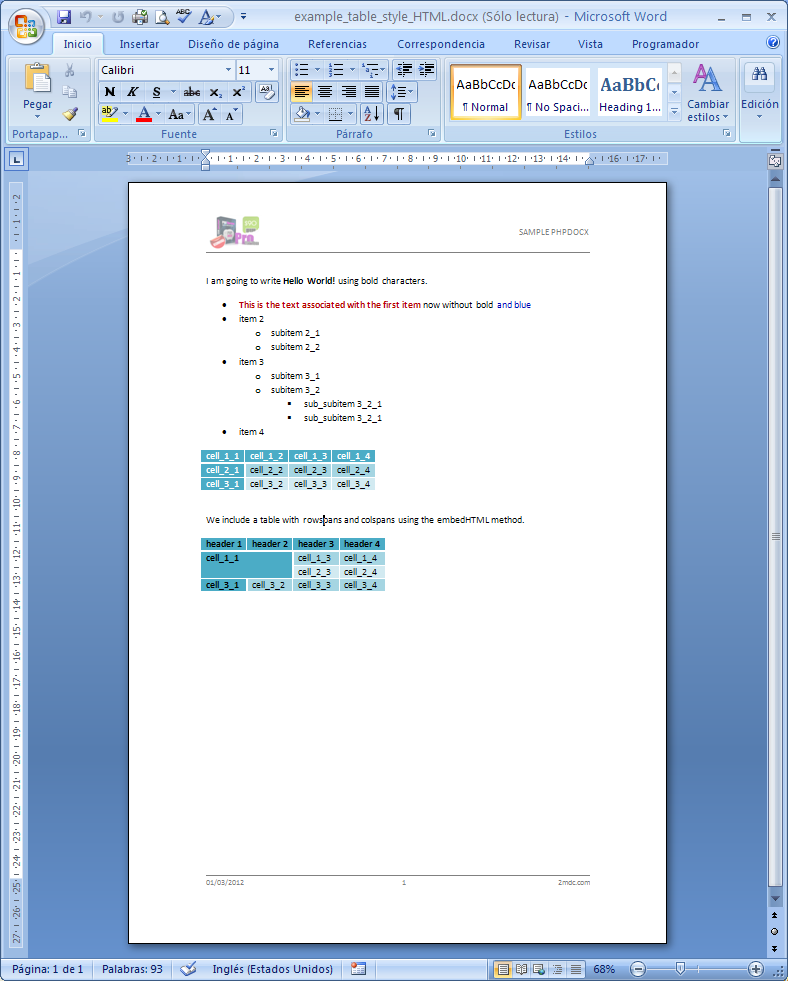
This certainly looks much nicer and pretty simple to implement (download the corresponding Word document):
But one always want something more and eventually one may need to insert tables with "rowspans" and "colspans". What can we do about that?
The simplest way to do it is to parse an HTML table and associate a Word style to it.
Like our script is starting to get a little lengthly let us concentrate only in the relevant part of it. Let's define a $myTable variable as follows:
$myHTML = '<br /><p style="font-family: Calibri; font-size: 11pt">We include a table with rowspans and colspans using the embedHTML method.</p>
<table style="font-family: Calibri; font-size: 11pt">
  <tr>
	  <td>header 1</td>
	  <td>header 2</td>
	  <td>header 3</td>
	  <td>header 4</td>
  </tr>
  <tr>
	  <td rowspan="2" colspan="2">cell_1_1</td>
	  <td>cell_1_3</td>
	  <td>cell_1_4</td>
  </tr>
  <tr>
	  <td>cell_2_3</td>
	  <td>cell_2_4</td>
  </tr>
  <tr>
	  <td>cell_3_1</td>
	  <td>cell_3_2</td>
	  <td>cell_3_3</td>
	  <td>cell_3_4</td>
  </tr>
</table>';
 $docx->embedHTML($myHTML, array('tableStyle' => 'MediumGrid3-accent5PHPDOCX'));
This should render a table like this (download the corresponding Word document):
WARNINGS:
If you use px instead of pt as your CSS units take into account a 0.75 relative scale factor.
By the way, if you do not like the styles that come bundled with PHPDocX (basically the quick styles that come with the standard Word 2007 distribution) you may import custom styles from other Word document using the importStyles() method or by using your own base template.
As you can foresee the embedHTML method may have multiple uses but for the sake of brevity we will ignore them by the time being and we will move forward to investigate how to include images and charts.
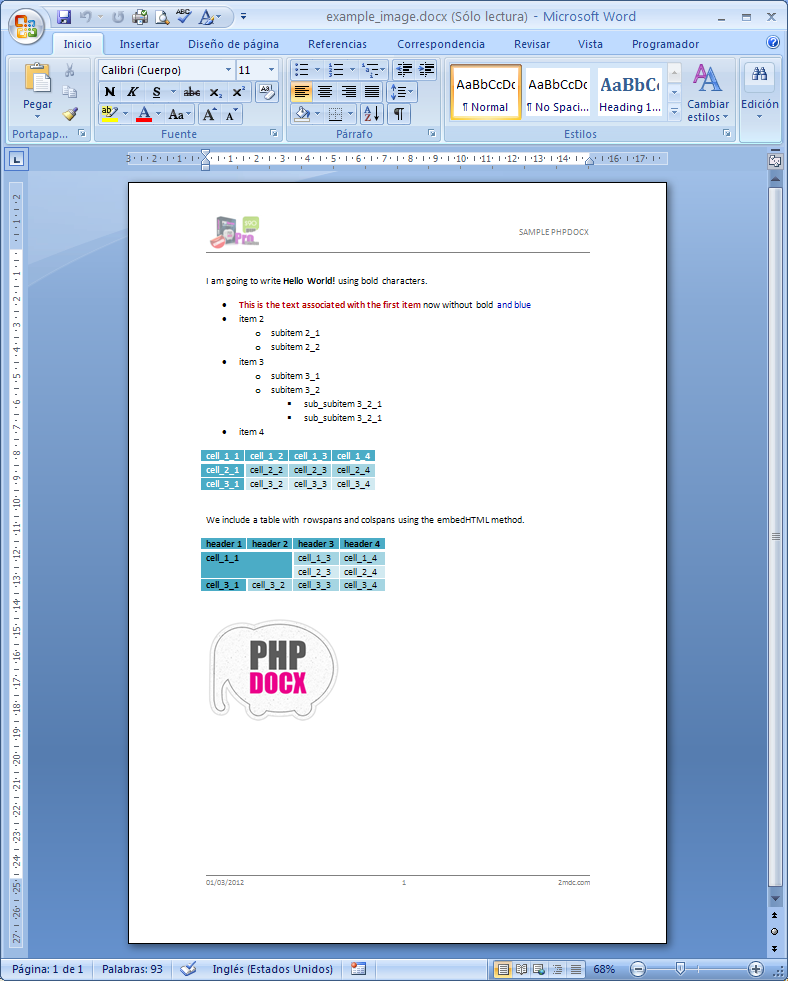
To insert an image is as simple as this:
$paramsImg = array(
'name' => '../img/image.png',//path to the image that we would like to insert
'scaling' => 90,//scaling factor, 100 corresponds to no scaling
'spacingTop' => 10,//top padding
'spacingBottom' => 10,//bottom padding
'spacingLeft' => 10,//left padding
'spacingRight' => 10,//right padding
'textWrap' => 1//corresponding to square format
);
$docx->addImage($paramsImg);
This should render an image like this (download the corresponding Word document):
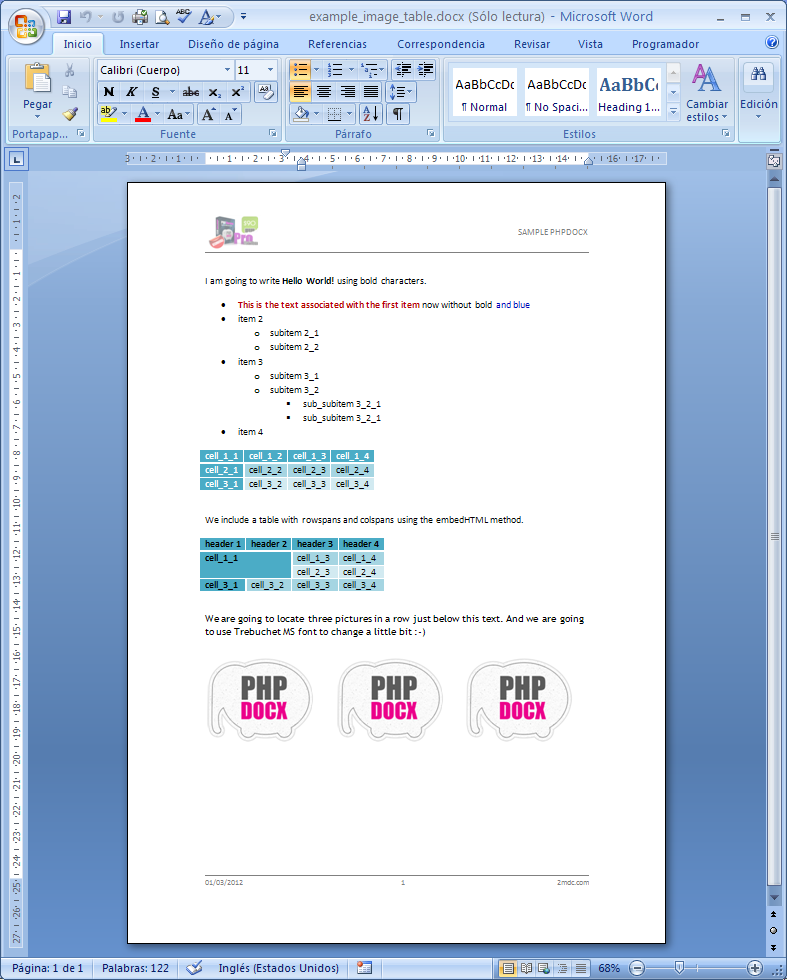
If you need to include more than one photo with a precise layout you may combine the addTable method with createWordMLFragment to generate the desired ouput. For example:
$text = 'We are going to locate three pictures in a row just below this text. And we are going to use Trebuchet MS font to change a little bit :-)';

$paramsText = array(
	'font' => 'Trebuchet MS'
);

$docx->addText($text, $paramsText);

$images = array('aeg.png','aeg.png','aeg.png');
$wordImages = array();

foreach ($images as $image) {
	$paramsImg = array(
		'name' => $image,//The image to be inserted
		'dpi' => 120,//We force the images to a 100 dpi resolution
		'scaling' => 90,//We scale them at 90% size
		'spacingTop' => 10,//top padding
		'spacingBottom' => 10,//bottom padding
		'spacingLeft' => 10,//left padding
		'spacingRight' => 10,//right padding
		'textWrap' => 1,//corresponding to square format
		'rawWordML' => true//The result will be stored in a WordML fragment
	);
	$imageData = $docx->addImage($paramsImg);
	$imageFragment = $docx->createWordMLFragment($imageData);
	array_push($wordImages, $imageFragment);

}
$paramsTable = array(
	'TBLSTYLEval' => 'NormalTablePHPDOCX',
);
$valuesTable = array($wordImages);
$docx->addTable($valuesTable, $paramsTable);
This should now render the three inserted image like this(download the corresponding Word document):
To finish with the most basic functionality of PHPDocX we are going now to insert a chart.
PHPDocX virtually allows to include any chart that can be included through the standard Word interface:
- 2D and 3D pie charts,
- 2D and 3D bar graphs,
- 2D and 3D col bars,
- 2D and 3D area charts,
- 2D and 3D line charts,
- 2D and 3D surface charts,
- 2D and 3D bubble charts,
- radar charts,
- donought charts,
- scatter charts.
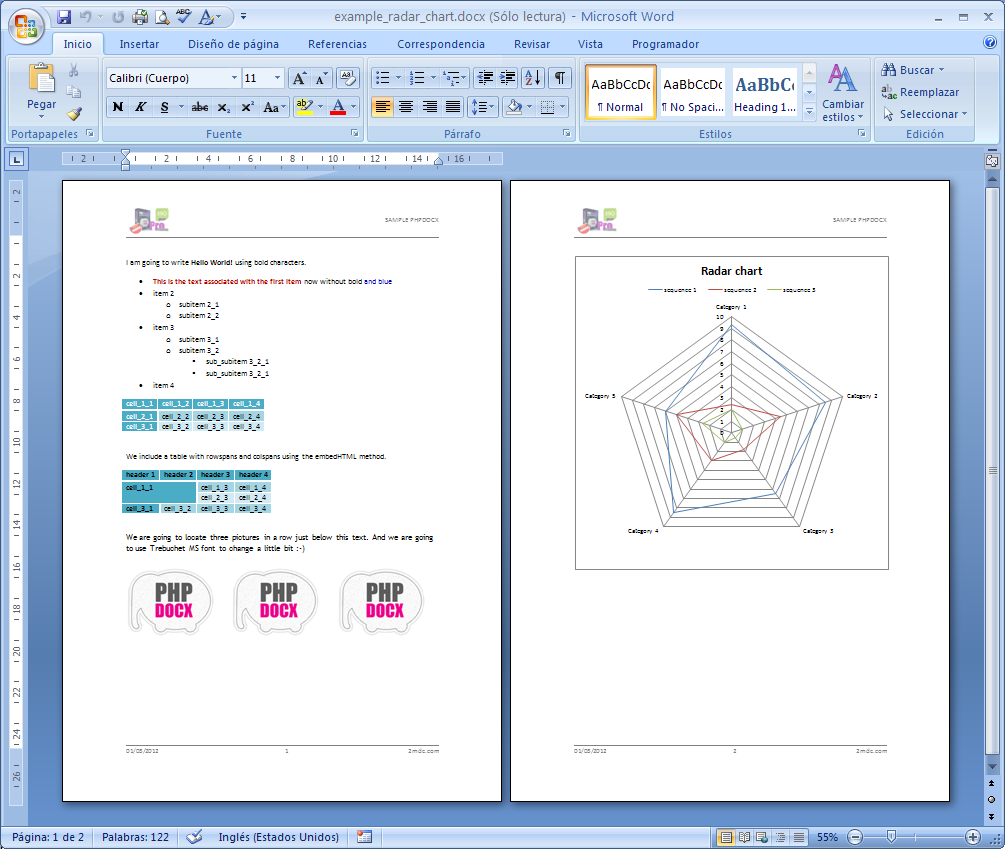
As an example we will include a radar type chart:
$legends = array(
'legend' => array('sequence 1', 'sequence 2', 'sequence 3'),
'Category 1' => array(9.3, 2.4, 2),
'Category 2' => array(8.5, 4.4, 1),
'Category 3' => array(6.5, 1.8, 0.5),
'Category 4' => array(8.5, 3, 1),
'Category 5' => array(6, 5, 2.6),
);
$args = array(
'data' => $legends,
'type' => 'radar',
'style' => 'radar',
'title' => 'Radar chart',
'sizeX' => 15, 'sizeY' => 15,
'legendPos' => 't',
'border' => 1,
'vgrid' => 1
);
$docx->addChart($args);
And you get (download the corresponding Word document):
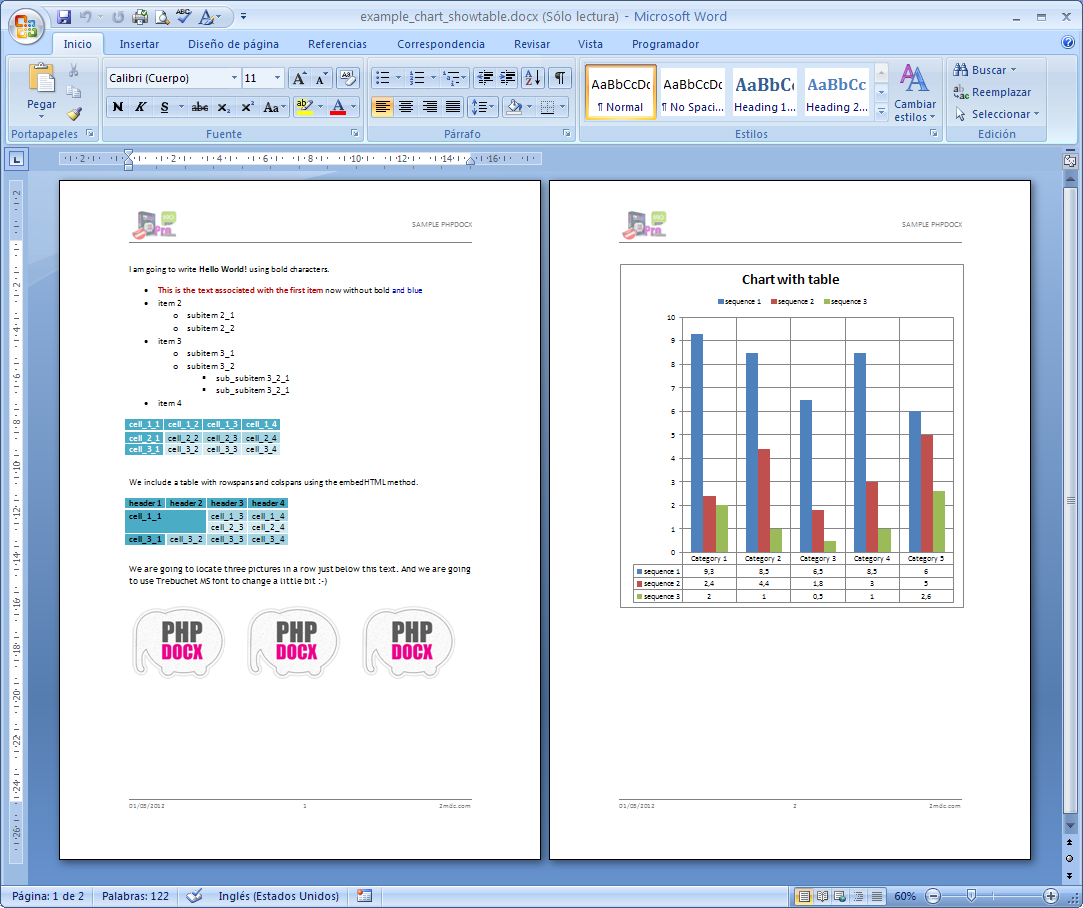
In order to see all the available options you should visit the Full reference Documentation, nevertheless to illustrate the flexibility of PHPDocX you may chane very easily to a bar chart with the associated data data table just by setting the 'showtable' option to 1 and setting the type to "colBar":
$legends = array(
'legend' => array('sequence 1', 'sequence 2', 'sequence 3'),
'Category 1' => array(9.3, 2.4, 2),
'Category 2' => array(8.5, 4.4, 1),
'Category 3' => array(6.5, 1.8, 0.5),
'Category 4' => array(8.5, 3, 1),
'Category 5' => array(6, 5, 2.6),
);
$args = array(
'data' => $legends,
'type' => 'colBar',
'title' => 'Chart with table',
'sizeX' => 15, 'sizeY' => 15,
'legendPos' => 't',
'border' => 1,
'vgrid' => 1,
'showtable' => 1
);
$docx->addChart($args);
So this time we will obtain (download the corresponding Word document):
Using your own base template and setting up general config options
We have already commented that PHPDocX users may use their own "base templates" in order to generate their custom documents or reports.
The procedure is quite simple. One only has to make a call to the desired template whenever a new docx is created:
require_once(path_to_phpdocx/classes/CreateDocx.inc);
$docx = new CreateDocx('../word_documents/numberedHeadings.docx');//You should include the path to your base template
$docx->addText('This is a numbered Heading', array('pStyle' => 'Heading1PHPDOCX'));
$docx->addText('Hello world again!');
$docx->addText('This is a  Subheading', array('pStyle' => 'Heading2PHPDOCX'));
$docx->addText('No more Hello world, please!');
$docx->createDocx('../word_documents/new_baseTemplate');
As you may see from the result(download the corresponding Word document):
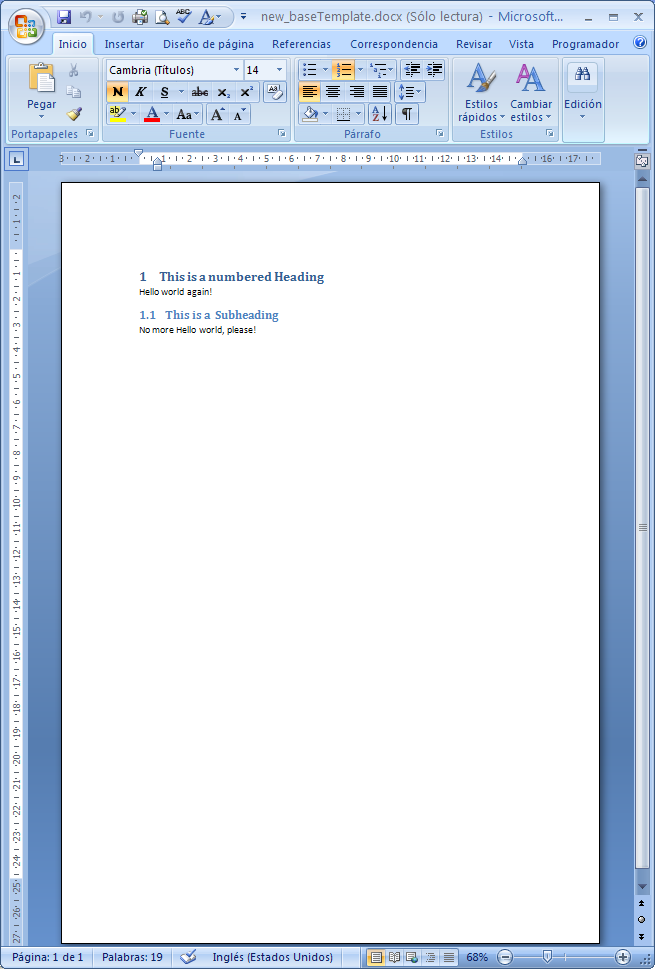
You may get customized headers and footers as well as many other configuration options in just one shot.
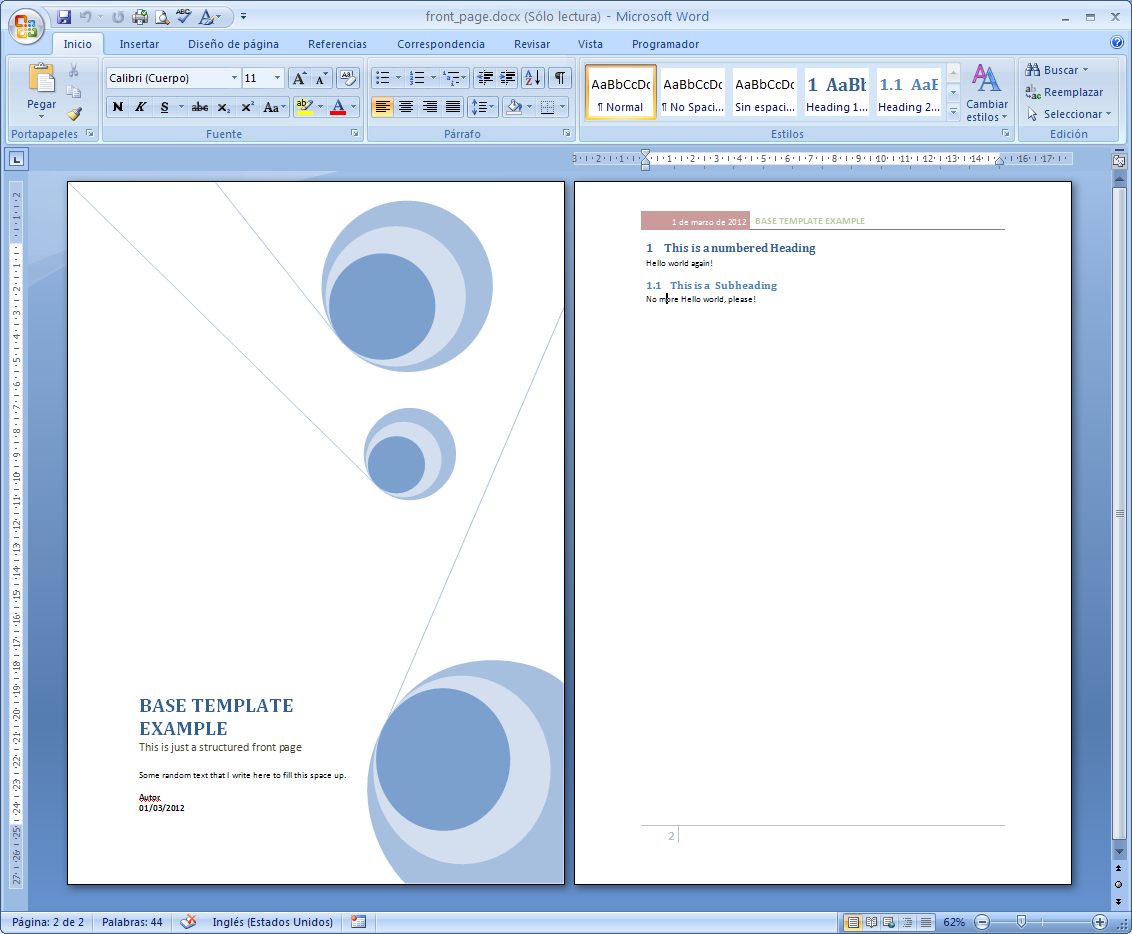
For example you may also include a "front page" as structured content that will be preserved by PHPDocX:
require_once(path_to_phpdocx/classes/CreateDocx.inc);
$docx = new CreateDocx('../word_documents/frontPageTemplate.docx');//You should include the path to your base template

$docx->addText('This is a numbered Heading', array('pStyle' => 'Heading1PHPDOCX'));
$docx->addText('Hello world again!');
$docx->addText('This is a  Subheading', array('pStyle' => 'Heading2PHPDOCX'));
$docx->addText('No more Hello world, please!');
$docx->createDocx('../word_documents/front_page');;
So we get (download the corresponding Word document):
Nevertheles to use the default template may show convenient because it has been prepared to have available all the standard Word style options.
If you use your own template make sure, by using the parseStyles() method that you have enough styles at your disposal.
WARNINGS:
The contents of your baseTemplate will be ignored (only headers,footers and "front page", if it has been inserted as stuctured content, will survive in the final document). If you really want to work with an existing template for your document content you should use the addTemplate() method on which we will ellaborate on next section.
Before going ahead with templates we would like to comment on the fact that since PHPDocX v2.5 there is a configuration file: classes/PHPDOCXConfig.inc where the following parameters can be globally set (although they can be override by the corresponding methods for each particular document):
- Base Template
- Default language
- Deafault paper size (A4, A3, letter or legal)
How to prepare a template for PHPDocX
It is quite often that rather than writing a full document from scratch we just need to do certain modifications on an existing document:
- Include a client"s name
- Redraw a chart depending on new dynamical data
- Populate a table with certain dynamical data coming from a database, i.e. items in an invoice
- Change certain images
- Etcetera
For all those cases PHPDocX allows to use an existing Word document and do all the required substitutions just by inserting the adequate placeholders variables.
For example, if we have a letter where the only "variable" part of it is a name we could:
- Replace the name by the variable: $NAME$
- Extract from a data source the actual name to be used in the resulting document and perform the substitution via the addTemplateVariable() method.
Let us carry out this process in greater detail.
First write, using your favourite Word editor, a very simple Word document like this:
Dear $NAME$,
I would like to say something interesting but unfortunately I do not have much to say.
Best regards,
PHPDOCX Guru
WARNINGS:
Do not forget to save your document with the .docx extension and call it, for example, myTestTemplate.docx.
For your convenience you may download the document here.
The required PHPDocX script needed to carry away the replacement is as simple as this:
require_once(path_to_phpdocx/classes/CreateDocx.inc);
$docx = new CreateDocx();
$docx->addTemplate('../word_documents/myTestTemplate.docx');
$docx->addTemplateVariable('NAME', 'John Smith');
$docx->createDocx('../word_documents/test_template');
?>
And you will get as a result(download the corresponding Word document):

If you wish you may change the symbol used to enclosed the placeholder variable to, for example '#' using the setTemplateSymbol('#') method.
WARNINGS:
The inclusion of placeholder variables is slightly different in the case of images. In that case one should include the placeholder variable in the alternative text associated with the image. This is done, for example in the Word 2007 interface by clicking on the selected image with the right mouse button, choosing the size menu entry and going to the "alternative text" tab.
Since PHPDocX v2.5.1 we have a new method available, replaceTemplateVariableByHTML() that may be of great help. It basically simplifies the process to include new content from HTML into a Word document.
replaceTemplateVariableByHTML() basically extends the functionality of the embedHTML() in the case of templates. But everything may be more easily explained by a simple example.
Let us assume that you want to include some information coming from a web page into your Word document. You may do so, preserving the format of the original HTML document in a very simple way:
require_once(path_to_phpdocx/classes/CreateDocx.inc);
$docx->addTemplate('../word_documents/testHTML2mdc.docx');
$docx->replaceTemplateVariableByHTML('ADDRESS', 'inline', '<p style="font-family: verdana; font-size: 11px">C/ Mat�as Turri�n 24, Madrid 28043 <b>Spain</b></p>', array('isFile' => false, 'parseDivsAsPs' => true, 'downloadImages' => false));
$docx->replaceTemplateVariableByHTML('CHUNK_1', 'block', 'http://www.2mdc.com/PHPDOCX/example.html', array('isFile' => true, 'parseDivsAsPs' => true, 'filter' => '#capa_bg_bottom', 'downloadImages' => true));
$docx->replaceTemplateVariableByHTML('CHUNK_2', 'block', 'http://www.2mdc.com/PHPDOCX/example.html', array('isFile' => true, 'parseDivsAsPs' => false, 'filter' => '#lateral', 'downloadImages' => true));
$docx->createDocx('../docx/replaceTemplateVariableByHTML');
And you will get as a result (download the corresponding Word document):
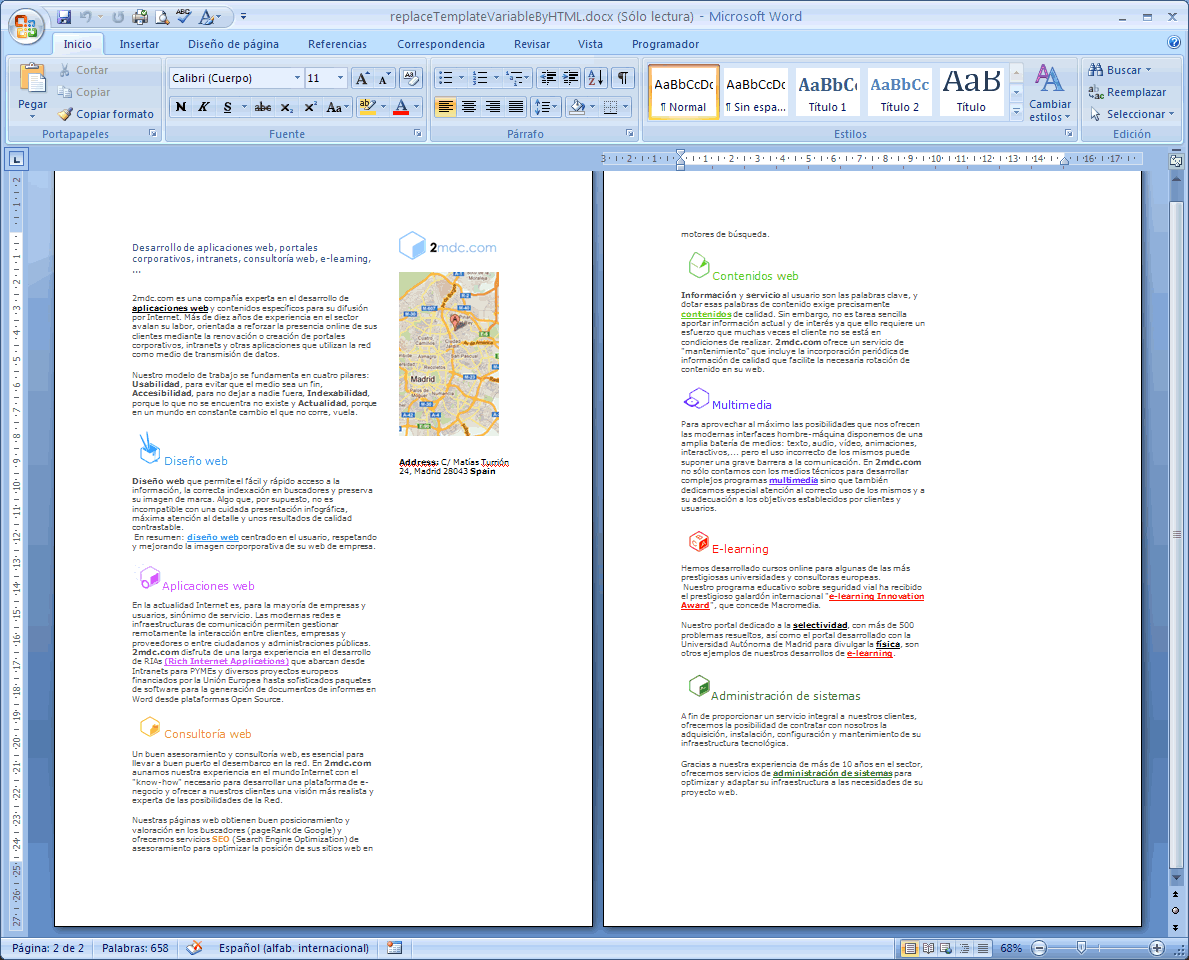
The HTML content, as seen in the example, may come from a external HTML page or from a string. The filter parameter has been used to select different portions of the original HTML code and insert them in the Word document as desired. it does not only admits single id references one can introduce an array with different ids, classes and tags of his choice.
How to process a template with PHPDocX
Now we are going to show you an example that you may see at work in this very same website: http://www.phpdocx.com/demo.
This demo requires three different templates that you may download, together with the PHP script, from this zip file available online.
Like you can download all the required files and the resulting Word document from our "Demo Page" we will not include in the following nor screen capture neither the eesulting .docx files.
Let us first have a look at the whole script:
require_once 'path to phpdocx';
$docx = new CreateDocx();
$dir = 'path to the folder with the templates';
$docx->addTemplate($dir. 'template_' . $_POST['template'] . '.docx');//We use the template chosen by the user

//Some variables included in the front page
$docx->addTemplateVariable('VAR_DATE', date("n/d/Y"));
$docx->addTemplateVariable('VAR_NAME', $_POST['FullName']);
$docx->addTemplateVariable('VAR_TITLE', $_POST['Title']);


if(!empty($_POST['emptyData'])
   $_POST['emptyData'] == 'true'){
   $docx->deleteTemplateBlock('chart');//If there is no data we eliminate the block that includes the chart
}else{
    $aData = array();
    foreach($_POST as $ind => $val){
        if(substr($ind, 0, strlen('DataName_')) == 'DataName_'){
            $aData[$val] = array($_POST['DataValue_' . substr($ind, strlen('DataName_'))]);
        }
    }
        $chart1 = array(
        'type' => 'pie3DChart',
        'showPercent' => 1,
        'sizeX' => 10,
        'sizeY' => 6,
        'js' => 'center'
    );
    if($_POST['template'] == 2){//Different templates have different charts
        $chart1['type'] = 'pieChart';
    }elseif($_POST['template'] == 3){
        $chart1 = array(
            'type' => 'colChart',
            'font' => 'Times New Roman',
            'sizeX' => 14,
            'sizeY' => 7,
            'border'=> 'none',
            'jc' => 'center'
        );
        $chart1['type'] = 'colChart';
        $aData['legend'] = array('');            }

    $chart1['data'] = $aData;
    $docx->addTemplateChart('CHART_1', $chart1);
}

if(!empty($_POST['emptyList'])
   $_POST['emptyList'] == 'true'){//If there is no data we eliminate the block containing the table
   $docx->deleteTemplateBlock('table');
}else{
   $aData = array();
    foreach($_POST as $ind => $val){
        if(substr($ind, 0, strlen('List_')) == 'List_'){
            $aData[] = array('VAR_ITEM' => $val, 'VAR_PRICE' => $_POST['AddressList_' . substr($ind, strlen('List_'))]);
        }
    }
    $docx->addTemplateVariable($aData, 'table', array('header' => false));
}
 if(empty($_POST['HTMLCode']) || $_POST['HTMLCode'] == '<p>Text with HTML format.</p>')//If the user has not included any HTML text we eliminate the associated block
   $docx->deleteTemplateBlock('html');
else{
	  $code = stripslashes($_POST['HTMLCode']);
    $code = '<head><style type="text/css">p{font-family: Arial;font-size:11pt;}li{font-family: Arial;font-size:11pt;}</style></head><body>' .  $code . '</body>';
    $docx->addTemplateVariable('CHUNK_1',$code, 'html');
}
$docx->addTemplateImage('IMAGE_1' , $dir . 'image_'.$_POST['image'].'.jpg');
$docx->clearBlocks();//We clean any remaining block tags
$docx->createDocxAndDownload('/tmp/demo_template');//we send the resulting document to the browser
Let us analyse this script step by step.
The first chunk of code reads:
$docx = new CreateDocx();
$dir = 'path to the folder with the templates';
$docx->addTemplate($dir. 'template_' . $_POST['template'] . '.docx');//We use the template chosen by the user
We just create a new PHPDocX instance. Depending on the template choosen by the user in the corresponding webform we load into PHPDocX the coprresponding template with the addTemplate() method.
In the following block of code we start the actual parsing of the selected template:
//Some variables included in the front page
$docx->addTemplateVariable('VAR_DATE', date("n/d/Y"));
$docx->addTemplateVariable('VAR_NAME', $_POST['FullName']);
$docx->addTemplateVariable('VAR_TITLE', $_POST['Title']);
This three lines of code do an standard "variable by string" substitution. The first of them all inserts the current date using the standard PHP date() method, while the last two substitute the VAR_NAME (in the header) and VAR_TITLE (front page) variables by the values introduced by the user in the corresponding web form.
Now things start to get more sophisticated with:
if(!empty($_POST['emptyData'])
   $_POST['emptyData'] == 'true'){
   $docx->deleteTemplateBlock('chart');//If there is no data we eliminate the block that includes the chart
}else{
    $aData = array();
    foreach($_POST as $ind => $val){
        if(substr($ind, 0, strlen('DataName_')) == 'DataName_'){
            $aData[$val] = array($_POST['DataValue_' . substr($ind, strlen('DataName_'))]);
        }
    }
        $chart1 = array(
        'type' => 'pie3DChart',
        'showPercent' => 1,
        'sizeX' => 10,
        'sizeY' => 6,
        'js' => 'center'
    );
    if($_POST['template'] == 2){//Different templates have different charts
        $chart1['type'] = 'pieChart';
    }elseif($_POST['template'] == 3){
        $chart1 = array(
            'type' => 'colChart',
            'font' => 'Times New Roman',
            'sizeX' => 14,
            'sizeY' => 7,
            'border'=> 'none',
            'jc' => 'center'/*,
            'groupBar' => 'stacked'*/
        );
        $chart1['type'] = 'colChart';
        $aData['legend'] = array('');            }

    $chart1['data'] = $aData;
    $docx->addTemplateChart('CHART_1', $chart1);
}
The first "if" checks wether the user has introduced any data for the chart. If false we delete all the content between the two placeholder variables $BLOCK_chart$ with the deleteTemplateBlock() method (note that the prefix "BLOCK_" is omitted from the argument).
If there is data to represent graphically we prepare it, as usual, in an array with the standard options and use the addTemplateChart() method for the replacement. This example is a little more convoluted because the user may choose between three different ways to represent his/her data.
The following chunk of code is particularly interesting because it allows us to populate a table with a custom number of rows depending on the user input:
if(!empty($_POST['emptyList'])
   $_POST['emptyList'] == 'true'){//If there is no data we eliminate the block containing the table
   $docx->deleteTemplateBlock('table');
}else{
   $aData = array();
    foreach($_POST as $ind => $val){
        if(substr($ind, 0, strlen('List_')) == 'List_'){
            $aData[] = array('VAR_ITEM' => $val, 'VAR_PRICE' => $_POST['AddressList_' . substr($ind, strlen('List_'))]);
        }
    }
    $docx->addTemplateVariable($aData, 'table', array('header' => false));
}
Again we check if there is data to populate the table and in the contrary we remove the corresponding block of the document.
if there is data, we include it in an array and insert it in the preformatted table with the addTemplateVariable() method that has been overloaded with two parameters: "table", to instruct PHPDocX that we would like to create a new table row for each of the items of the $aData array, plus an option to indicate to PHPDocX that the table header is not to be repeated in every page when the table spreads through more than one page.
This block of code:
if(empty($_POST['HTMLCode']) || $_POST['HTMLCode'] == '<p>Text with HTML format.</p>')//If the user has not included any HTML text we eliminate the associated block
   $docx->deleteTemplateBlock('html');
else{
	  $code = stripslashes($_POST['HTMLCode']);
    $code = '<head><style type="text/css">p{font-family: Arial;font-size:11pt;}li{font-family: Arial;font-size:11pt;}</style></head><body>' .  $code . '</body>';
    $docx->addTemplateVariable('CHUNK_1',$code, 'html');
}
checks if the user has included any text in the "Rich Text Editor Box" avalaible in the web form and if so includes it as HTML in the resulting Word document with the method: $docx->addTemplateVariable('CHUNK_1',$code, 'html').
Well, we are almost done. The end of the code replace an existing placeholder image with the image used by the user via the: $docx->addTemplateImage('IMAGE_1' , $dir . 'image_'.$_POST['image'].'.jpg') method.
And we clean any reamining BLOCK tags with the clearBlocks() method before sending the final docx to the browser.
We hope that this tutorial has been of help and that you are now able to grasp all the potential uses that you may give to PHPDocX in your professional projects.
Enjoy!!
Appendix: how to insert complex paragraphs into a Word document
Up to the v2.6 version of PHPDocX the management of complex paragraphs was delegated to templates. But since v2.6 one could use the addPragraph method to insert into our Word document complex paragraphs with sophisticated formatting.
But the method addParagraph has itself become obsolete since v3.1 (we are considering deprecating it for next releases) and we now recommend the new addText method because it is much faster and offers further functionality.
Besides the standard styling (bold, italics, font family, font color, fornt size, margins, etcetera) with the new addText method one may also include floating images and charts, links and bookmarks, footnotes and endnotes, line and column breaks, page numbers, current date and hour as well as arbitrary shapes.
To illustrate this method let us nalyse in detail the following chunk of code:
require_once('path_to_phpdocx/classes/CreateDocx.inc');

$docx = new CreateDocx();

$paragraphOptions= array('sz' => '11');

$text = array();

$text[]=array('color' => 'ff0000',
              'font' => 'Arial',
              'i' => 'single',
              'sz' => '11',
              'text' => 'This is a run of text written in Arial 11pt, red and italics to illustrate how easy is to apply formatting to a run of text. '
               );

$text[]=array('color' => '00ff00',
              'font' => 'Arial',
              'sz' => '12',
              'text' => 'This is a run of text written in Arial 12pt and green color so you may check how properties are inherited or not from the general paragraph options. '
               );

//Now include an image
$paramsImg  = array('name' => '../files/img/logo_header.jpg',
                    'spacingLeft' => 20,
                    'spacingRight' => 0,
                    'spacingTop' => 10,
                    'spacingBottom' => 10,
                    'scaling' => 150,
                    'float' => 'right',
                    'textWrap' => 1,
                    'rawWordML' => true);
$imageData = $docx->addImage($paramsImg);
$image = $docx->createWordMLFragment($imageData);

$text[] = $image;

$text[] =array('sz' => '11',
              'text' => 'This run of text is written in normal black text with the default document font (usually calibri). Since PHPDocX v2.6 we may insert in a simple manner paragraphs that include complex formatting, floating images, inline HTML content, links, bookmarks and even footnotes and endnotes in a very simple manner. '
               );

 //Now include a footnote
 $footnoteData = $docx->addFootnote(array(
			'textDocument' => 'To include a footnote',
			'textFootnote' => 'You can also style the footnotes content, please, look in the API documentation.',
			'rawWordML' => true
		)
	);
$footnote = $docx->createWordMLFragment($footnoteData);

$text[] = $footnote;

$text[] = array('text' => ' in the middle of the paragraph is as simple as this. ');

//And a link
$linkData = $docx->addLink('Link to phpdocx.com', array('url'=> 'http://www.phpdocx.com', 'color' => 'blue', 'u' => 'single', 'rawWordML' => true));
$link = $docx->createWordMLFragment($linkData);

$text[] = $link;

$text[] = array('text' => ' and some bookmarked data: ' );

//Add the bookmark
$bookmarkStart = $docx->addBookmark(array('type' => 'start', 'name' => 'bookmark_name', 'rawWordML' => true));
$bookmarkText = $docx->addText(' text that has been bookmarked.', array('rawWordML' => true));
$bookmarkEnd = $docx->addBookmark(array('type' => 'end', 'name' => 'bookmark_name', 'rawWordML' => true));
$bookmark = $docx->createWordMLFragment(array($bookmarkStart, $bookmarkText, $bookmarkEnd));

$text[] = $bookmark;

$text[] = array('text' => ' we are going to finish this long example with a line break', 'lineBreak' => 'after');
$text[] = array('text' => 'just here.');

$docx->addText($text, $paragraphOptions);

//Another paragraph with a link to the previous bookmarked text

$text = array();

$text[] = array('text' => 'We may now link internally to the bookmark we have included in the last paragraph '
               );
//And a link to bookmark
$linkData = $docx->addLink('in this internal link', array('url'=> '#bookmark_name', 'color' => 'blue', 'u' => 'single', 'rawWordML' => true));
$link = $docx->createWordMLFragment($linkData);

$text[] = $link;

$text[] =array('text' => ' just by including a URL parameter as it is done usually with anchors.');

$docx->addText($text);


$docx->addText('We finish by adding a very simple plain text.');


$docx->createDocx('../docx/complex_paragraph');
And we obtain the following docx document (download the corresponding Word document):
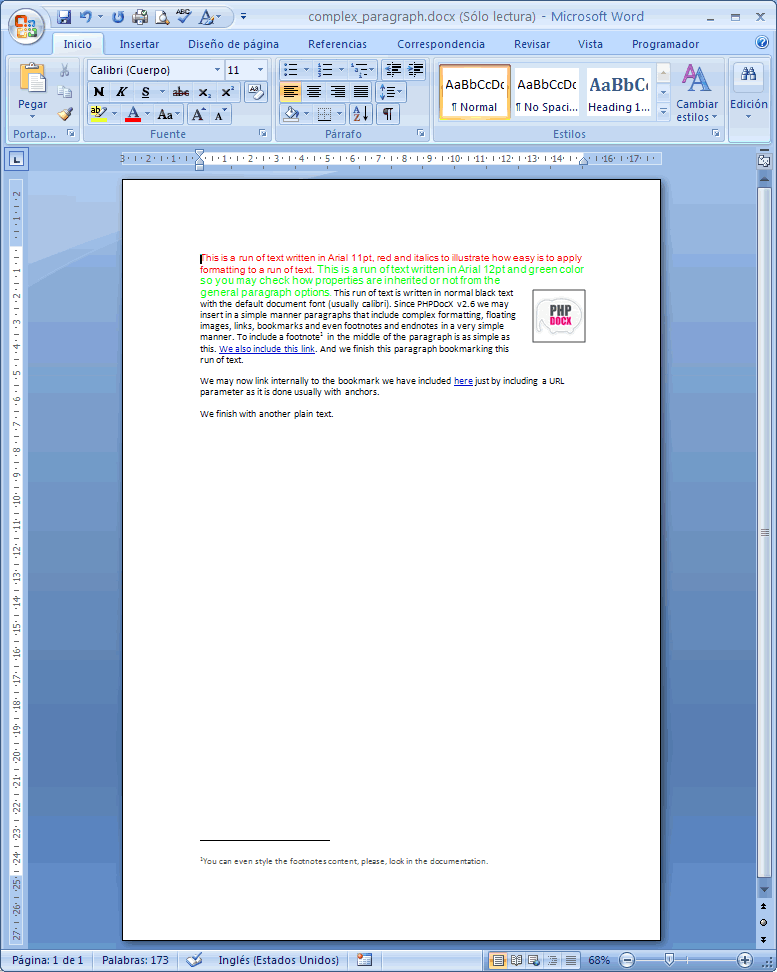
As you may see the addText method requires of two arguments:
- The first one that we named "$text" includes all the info about the actual content included in the paragraph: text runs and specific formatting options. Notice that now the content of a run could be, besides ordinary text, an arbitrary WordML fragment offering us practically unlimited posibilities.
- The second one that was named by "$paragraphOptions" in the example includes all the general formatting options applied to tue whole paragraph.
Although it has not been used in the example above it is also posible to include shapes in a similar manner. We will now use them to illustrate a different usage of the addText method.
Sometimes one may need to include a complex paragraph inside a table cell or as part of list of items, as we will see now the addtext method let us do so in quite a simple manner by setting to true the "rawWordML" option.
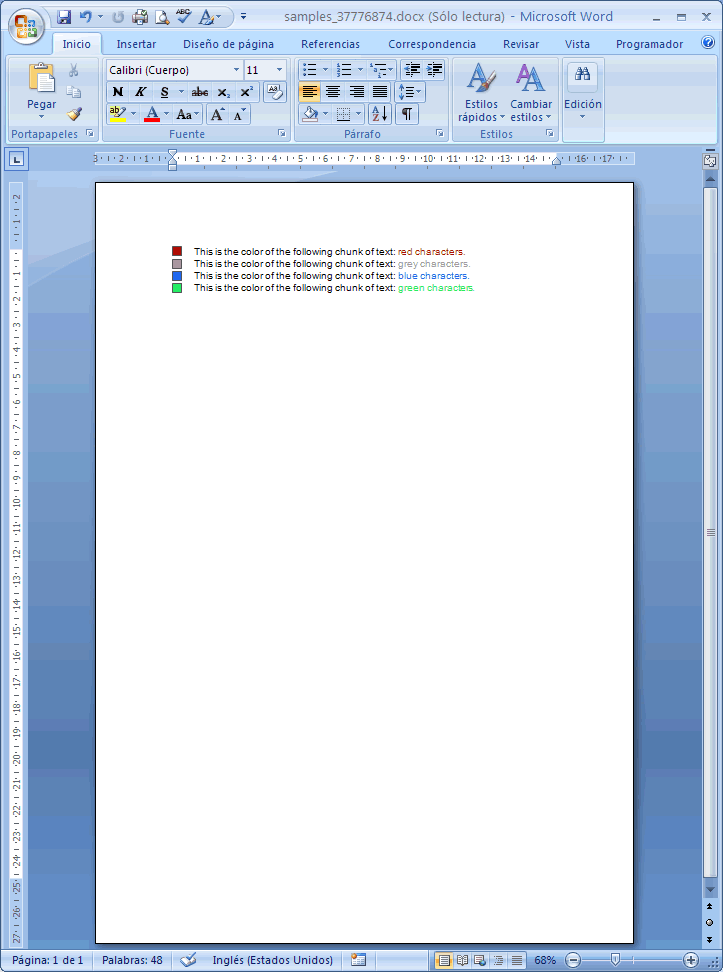
We are now going to write the PHPDocX code needed to generate a Word document that looks like this: (download the corresponding Word document):
require_once 'path_to_phpdocx/CreateDocx.inc';

$docx = new CreateDocx();


$colors = array('red' =>'b70000',
                'grey' => '999999',
                'blue' => '2565ee',
                'green' => '25ee65');

$tableValues = array();

foreach($colors as $key => $value){
	$paragraphOptions = array('spacingTop' => 0, 'spacingBottom' => 0, 'rawWordML' => true);

	$text = array();
	$rect =  array('rawWordML' => true,
                'width' => 10,
                'height' => 10,
                'strokecolor' => '#555555',
                'strokeweight' => '1',
                'position' => 'relative',
                'margin-top' => '1.5',
                'fillcolor' => '#'.$value);

	$shapeData = $docx->addShape('rect', $rect);

	$shape = $docx->createWordMLFragment($shapeData);

	$text[] = $shape;

	$text[] = array('color' => '000000',
                  'font' => 'Arial',
                  'sz' => '11',
                  'text' => '          '
               );

	$text[] = array('color' => '000000',
                  'font' => 'Arial',
                  'sz' => '11',
                  'text' => 'This is the color of the following chunk of text: '
               );
	$text[] = array('color' => $value,
                  'font' => 'Arial',
                  'sz' => '11',
                  'text' => $key.' characters.'
               );
  $textData = $docx->addText($text, $paragraphOptions );
  $text = $docx->createWordMLFragment($textData);

  $tableRow = array($text);
  $tableValues[] = $tableRow;
}

$tableOptions = array('border' => 'none');
$docx->addTable($tableValues, $tableOptions);


$docx->createDocx('samples_color');
In this particular case we have chosen to insert the paragraph content inside a series of table cells. This example is artificially complicated but we have chosen to do it so to better illustrate the capabilities of the addText method and more generally the 'rawWordML' option. The generalization to the addList method is straightforward and we leave it as an exercise to the reader.
The different available shape options are described in the API documentation for the addShape method.
Appendix: how to use the PDF/DOC/RTF/HTML/ODT conversion plugin
Since v2.5 the PRO+ and CORPORATE versions of PHPDocX include a plugin for advanced conversion to PDF, DOC, RTF, HTML and ODT formats.
This plugin is based on the conversion engine of Open Office so it transforms the resulting Word documents exactly as Open Office would do it.
This conversion has still some limitations, Word charts are just ignored, but it produces very good results in the majority of cases.
WARNINGS:
- This plugin requires JRE 1.5 or higher to be installed in the web server, although it not requires any coding in Java.
- By the time being only works in LINUX servers (for a Windows compatible solution see below).
- The included version of OpenOffice is for 32bits Linux OS. To run it on 64bits servers just install the package ia32-libs available on every Linux distribution.
- There are a few methods in PHPDocX that are incompatible with the conversion plugin. We have introduced the enableCompatibilityMode method to inform the user of such incompatibilities.
Its use is extremely simple:
require_once 'path_to_phpdocx/classes/CreateDocx.inc';

$docx = new CreateDocx();

$docx->enableCompatibilityMode();

$text = 'Lorem ipsum dolor sit amet, consectetur adipisicing elit, ' .
    'sed do eiusmod tempor incididunt ut labore et dolore magna aliqua. Ut ' .
    'enim ad minim veniam, quis nostrud exercitation ullamco laboris nisi ut' .
    'aliquip ex ea commodo consequat. Duis aute irure dolor in reprehenderit ' .
    'in voluptate velit esse cillum dolore eu fugiat nulla pariatur. ' .
    'Excepteur sint occaecat cupidatat non proident, sunt in culpa qui ' .
    'officia deserunt mollit anim id est laborum.';

$paramsText = array(
    'b' => 'single',
    'font' => 'Arial'
);

$docx->addText($text, $paramsText);

$docx->createDocx('example_text');
$docx->transformDocx('example_text.docx', 'example_text.pdf');
Basically one just needs to generate the Word document with PHPDocX as usual and call the transformDocX method with first argument the docx to be converted and as second argument the destination file with the desired extension.
WARNINGS:
- If the plugin is not correctly initialized you may get an error. In that case you may:
- Run the following command: $ ../lib/openoffice/openoffice.org3/program/soffice -headless -accept="socket,host=127.0.0.1,port=8100;urp;" -nofirststartwizard')
- Or run OpenOffice as a service. In order to do that you may save this script in your init.d files, set OpenOffice path in OOo_HOME var and start the service with: $ /etc/init.d/openoffice start, or using the service command.
Since v2.5.1 there is also available an interface with MS Word via COM that also allows for multiple format conversions.
We offer here a very simple example of use that is included in the example folder of the package:
require_once 'path_to_phpdocx/classes/CreateDocx.inc';
$docx = new CreateDocx();
$pathToScript = dirname ( __FILE__ );
$pathArray = explode("\\", $pathToScript);
array_pop($pathArray);
$pathToFile = implode("\\", $pathArray)."\\files\\";
$targetPath = implode("\\", $pathArray)."\\docx\\";
$myPath = str_replace("\\", "\\\\", $pathToFile);

$docx->transformDocxUsingMSWord($myPath.'TemplateText.docx', $targetPath.'test.pdf');
$docx->transformDocxUsingMSWord($myPath.'TemplateText.docx', $targetPath.'test.txt');
$docx->transformDocxUsingMSWord($myPath.'TemplateText.docx', $targetPath.'test.doc');
$docx->transformDocxUsingMSWord($myPath.'TemplateText.docx', $targetPath.'test.rtf');
$docx->transformDocxUsingMSWord($myPath.'TemplateText.docx', $targetPath.'test.html');
Of course, this requires to have a working instance of MS Word (2007 or newer) in the server.
Appendix: debugging options
PHPDocX uses log4php as an external library for debugging.
The configuration options for log4php can be found in the config/log4php.xml file.
The default setup is:
    <configuration xmlns="http://logging.apache.org/log4php/">
        <appender name="default" class="LoggerAppenderConsole">
            <layout class="LoggerLayoutPattern">
                <param name="conversionPattern" value="%date %logger %-5level %msg%n" />
            </layout>
        </appender>
        <root>
            <level value="warn" />
            <appender_ref ref="default" />
        </root>
    </configuration>
So by default you only get warnings and higher logging levels.
If you would like to get on screen the maximum level of information provided by PHPDocX you shoud replace "WARN" by "DEBUG";
If you prefer to get the info not directly on screen but in a log file you should change the appender element as follows:
    <configuration xmlns="http://logging.apache.org/log4php/">
        <appender name="default" class="LoggerAppenderFile">
            <layout class="LoggerLayoutPattern">
                <param name="conversionPattern" value="%date %logger %-5level %msg%n" />
            </layout>
            <param name="file" value="phpdocx.log" />
            <param name="append" value="true" />
        </appender>
        <root>
            <level value="trace" />
            <appender_ref ref="default" />
        </root>
    </configuration>